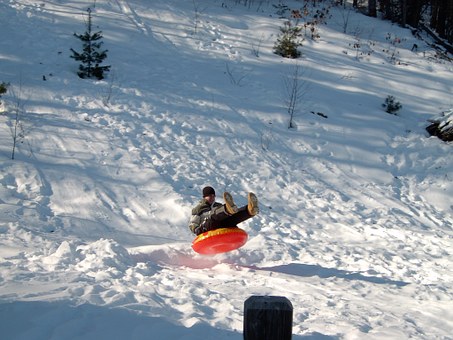
 Winter is here! Even though it might seem like it started many months ago, this is merely just the beginning. Soon, snow angels, snowmen, and snow forts will decorate your yard (depending on your location, of course). Around this time of year, it is tempting to play in the snow all day and forget about schoolwork. Outside, the endless possibilities of sledding and snow ball fights captivate the thoughts of your children. However, you can have a happy medium! If you have a sledding hill in your backyard, or even in your town, introduce your children to the realm of physics.
Here is one way that you can incorporate school and hands-on learning into playing outside in the snow. You’ll need some water, food coloring, a ruler, a stopwatch, and some kids and their sleds/tubes:
- At the top of the hill, mix the food coloring with the water and have one of your children make a marker with a line of colored water a few feet or yards past the starting point.
- Let one of your other kids mark a line in the snow at the bottom of the hill, right before the hill begins to flatten out.
- Have them measure the distance between the two markers: Let them count how many steps they take to cover this distance, and then measure with the ruler how many feet they cover with each step. Once that is done, have them multiply the number of steps by the feet covered per step to see how long the distance is.
- Finally, have the kids make one last marker approximately at the half way point between the top and bottom markers.
After this is accomplished, get out the stopwatch. As your child begins sledding, watch carefully and start the timer right when they cross the first marker that was placed a few yards down the hill. Keep watching closely, and then stop the timer when your child reaches the second marker near the bottom of the hill. You can also have your children take turns using the stopwatch and sledding, or designate one of your older children to stopwatch duty.
Now, the physics comes into play! Use the formula D = RT (Distance = Rate times Time). You calculated the distance in the first step, and now you just finished calculating the time! In order to find the rate, simply have your children divide the distance by the time. Now you have discovered the speed of your sledding child in feet per second! If you have multiple children, they can have competitions to see who can go at a faster speed.
If you would like to add complexity to this, incorporate the middle marker. Ask your children if they think the rate of speed from the top to the middle will be the same, faster, or slower than the rate of speed from the middle to the bottom. In order to calculate this, either use two stopwatches or use the ‘lap’ button. Start the stopwatch (or have one of your other children start it) when your child passes the first marker. Then, hit the lap button when he or she reaches the middle marker. Finally, stop the stopwatch when your child reaches the third and final marker. Now, have one of your children calculate the average speed that your child had in the first part of the trip by dividing half the distance by the time of the first lap on the stopwatch. (Use half since we are measuring the speed from the start to the middle, and then from the middle to the end in two different equations). Then, have another one of your kids divide half the distance by the second lap on the stopwatch. Now your children have calculated the speed at which they traveled in the first part of the ride, and also in the second! Then, you can see if your assumptions were correct.
You can also try things like making your child sit in different positions to see if that affects the speed at which they travel, letting them get a running start, or starting higher up on the sledding hill with a larger distance between the child and the first marker. Before trying something, always make a scientific assumption to see what the outcome will be and have your children do likewise.
Have fun!

