 Here’s a cool warm weather idea! Your children can learn a little Math (measuring) and Science along the way while making this delectable treat! Do this outside and avoid all the mess!
What you need:
- Zip top freezer bags in two sizes. One each; quart and gallon.
- 1/2 cup half and half
- Ice
- 1/2 cup ice cream salt (also known as rock salt)
- 1/2 tsp vanilla extract
- 1 TBSP sugar
Optional to add once the ice cream is made:
- Sprinkles
- Favorite toppings
Instructions:
Fill the larger plastic bag with ice (about half way).
Pour in 1/2 cup salt. (You are NOT eating the salt.)
Add to the smaller bag, the half and half, sugar, vanilla, and any add-ins (like sprinkles). Press out as much air as possible and close the bag.
TIP: This process is much easier to manage if you place your bag in a bowl when adding ingredients to serve as a holder.
Once you’ve added all the ingredients and sealed the bag; place the smaller bag inside of the larger bag. Adjust the ice so that it surrounds smaller bag. Press out air. Make sure the bag is tightly sealed.
Then, have fun while tossing, shaking, jiggling, mushing, jumping and dancing while the magic happens.
TIP: The bag will be very cold so you may want to wrap the bag inside a small towel. Then shake the bag, holding the corners of the towel.
After about 5 minutes (or longer, depending on the dedication of your children) check the ice cream. Shake more if needed until desired consistency is achieved. Enjoy!
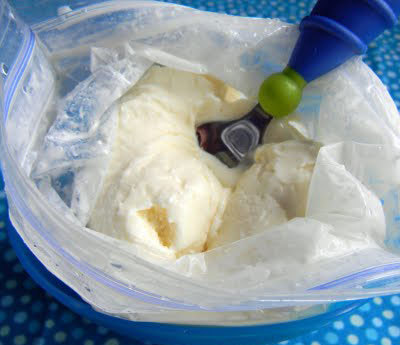
Eat straight from the bag, or spoon into a bowl and add toppings.
Here’s the science behind making ice cream:
The salt added to the ice lowers the freezing point of ice, causing the ice to melt. The melting ice absorbs heat, and makes the space around the ice cream ingredients freeze at a temperature below 32 degrees. Water freezes at 32 degrees, but milk is not just water so it needs a lower temperature.
