 If you are looking for an idea that will cool off your hot summer day, try this one. It’s educational and fun and, well, cool. This is very wet and can easily become messy so make sure to plan ahead. It can be done indoors but I recommend taking advantage of the warmth and doing this outdoors in bathing suits and then playing under the sprinkler when finished.
Here’s what you’ll need:
- Several bowls or dishes in varying shapes and sizes (for making the ice)
- Several large trays with sides – one for each piece of ice
- Table salt
- Small jelly jars or paper cups (one for each color)
- Liquid watercolors or food coloring (NOTE: watercolors are washable, food colors stain!)
- Eye droppers
What to do:
Begin a day or two before by filling varying sizes of dishes/bowls with water and freezing until solid. Make sure that you vary the depth of the water so that you end up with deep, shallow, small and large diameter ice. Make one set of two matching in size and depth set for comparison. It’s really only necessary to make the one matching set but it sure is fun to work with the ice so, in this case, more is better!
Once you are sure that the ice pieces are completely frozen and you are ready to begin the experiment, use a little warm water to get the ice out of the molds and place them one each on the trays.
Put one of the two comparison pieces aside for later.
Give your children each a small amount of table salt to sprinkle on the ice. Sprinkle in some spots and not in others. Do not over do this part; a little will go a long way.
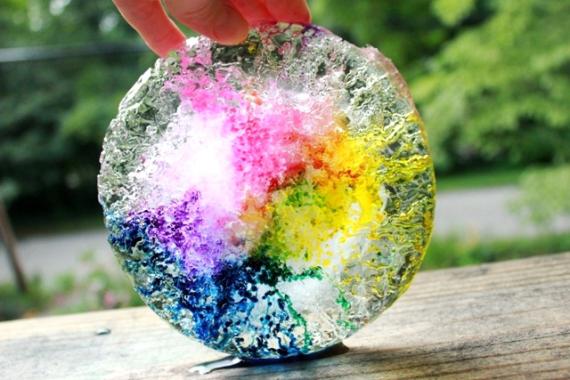
You’ll begin to see tiny ravines and craters forming. Observe as the ravines begin to grow.
Give each child an eye dropper and encourage them to begin adding small amounts of colors to the ice. A little goes a long way!
The colors are beautiful on their own, but the real reason for adding the liquid watercolors is to highlight the ravines, crevasses, and tunnels that are forming in the ice as the salt melts it. If you are already outside then you’ll see that the sun adds a little more interest as the ice will sparkle in the sun. Look at the bottom of the shallower ice pieces to see where tiny bubbles of color where the mixed salt and watercolors were pooled as they slowly ate away and melted the ice.
Ask your children to turn their attention to the piece of ice you previously put aside. Set it next to the colorful, salted one that is the same size. Compare the difference between the piece of ice melting naturally and the one that the salt has been added to. Discuss how the salt melts the ice. Since it’s a hot summer day, both pieces of ice will melt anyway but how will adding the salt make it melt differently? Discuss that the salt will melt ice at much cooler temperatures, and so wherever the salt touched the ice it will melt faster than the rest of the ice.
This is one of those experiments that that you can “play around” with for a long time, continuing to add more salt and colors. Have fun with this one!
Here is the Science behind the experiment:
The salt lowers the freezing point of water through a process called freezing point depression. The ice starts to melt, making liquid water. Salt dissolves in the water, adding ions that increase the temperature at which the water could re-freeze. As the ice melts, energy is drawn from the water, making it colder.
Enjoy!

