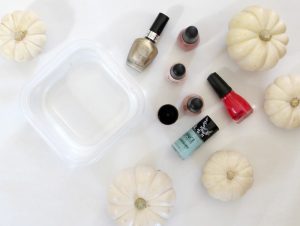
One of my favorite ways to decorate a pumpkin without all the mess of carving is marbling. It’s not a super messy or time-consuming technique, which makes it perfect for the kids.
If your children or friends have food allergies, you may choose to color your pumpkins teal. Teal is used as a color to communicate that you are choosing to be “food/treat“ sensitive to those with allergies for your fall get-togethers. That said, have your child choose any color they like. These really turn out SO beautifully you may want to incorporate several colors.

Here’s what you’ll need:
- A few white (or any color you choose) mini or pie-sized pumpkins
- A disposable plastic bowl with lukewarm water
- Stir stick
- Nail polish with your choice of color(s)
- Waxed paper for drying.
Optional supplies:
- glitter
Here’s what you do:
Ask your child to fill a medium-sized bowl with lukewarm or warm water. Note: If the water is too cold, the nail polish will sink to the bottom of the bowl and you do NOT want that. Add the nail polish and have your child carefully stir it with a toothpick *on top* of the water. Dip the pumpkin in the water and give it a few good tilts & spins. Remove it from the water and let it dry on the waxed paper. After 15-20 minutes turn it over so the other side can dry. That’s it! It really is so quick and simple but the results are stunning.
For variations: Allow your child to use multiple bowls and different colors of nail polish. If you are planning to mix the colors, allow 15 minutes in between colors for more vibrant results. Just a reminder – continue to ensure that the water is the right temperature for each color. If you just can’t get enough of this activity, try having your child stir about a teaspoon of glitter into the nail polish water for a little sparkle. These pumpkins will be beautiful for decorating with all season long!
Enjoy!

